How to put a stop to brake bearing problems: Part I

Why checking brakes beyond a quick glance of the friction material when presented with a failed bearing can help prevent further premature component failure.
Failed bearings can normally be described as rumbling noises from the motorist or when play is found at the point of a routine inspection. But why do wheel bearings fail?
Poor quality wheel bearings can fail faster, poor quality road surfaces contribute to early failure, and side-impact damage from road furniture such as a kerb can also cause problems. Nearside wheel bearings are likely to fail sooner than the offside due to the increased amount of water exposure from road drainage and gutters. Driving or standing in water will also wash the lubricant away, which is essential to the bearing’s operation.
Subjecting the wheel bearing to tolerances it was not designed for will also contribute to premature failure. Tyres out of balance or overloading vehicles will apply forces the bearings weren’t designed to tolerate. Incorrectly fitted wheel bearings are subjected to abuse as they are designed to deal with forces in very specific directions.
A failed wheel bearing, especially if allowed to run unchecked, can then affect the components around it. Motorists may notice uneven tyre wear, for example. As the wheel wobbles on the axle, this causes damage to the brake disc and associated components. Add to this increased heat from the bearing (due to lack of lubrication), and it could result in brake component failure, warping discs or even destroying the friction material. So how can you prevent catastrophe?
Four steps to keep wheels turning
1. Motorist interview
Performed either at the point of booking and/or vehicle drop off, asking the motorist a couple of questions about the car can help diagnosis for all repairs and recommendations for preventative maintenance. A small quiz or questionnaire prepared beforehand as part of the handover procedure can be valuable. Remember to treat all data collected in accordance with GDPR.
You could ask questions such as:
- Are there any noises from the vehicle, and are these affected by speed and/or manoeuvring?
- How long has the noise occurred?
- Does the noise happen all the time?
- When was the vehicle last serviced?
2. First inspection
A walk around the vehicle, recording any damage, mileage, fuel level, tyre tread, and any other obvious concerns, is a must before formally accepting the vehicle. Smart devices really come into their own here. An entry-level tablet in a rubberised case can save a lot of potential headaches, but a clipboard and a tick form can work just as well.
Once a walkaround satisfies that the vehicle is capable of a road test, unless the driver interview suggests a more thorough inspection is needed, it’s a good point to test drive the vehicle. Using a pre-inspection road test can help detect any noise, vibration or harshness, and the trusty smart device can be deployed to record the trip.
3. Floor level inspection
Checking the vehicle on the ground to ensure it can be safely lifted for the under-bonnet checks next. Habitually checking fluids, security of components, and any other concerns at this point continues to build a picture of the overall health of the car.
4. At working height inspection
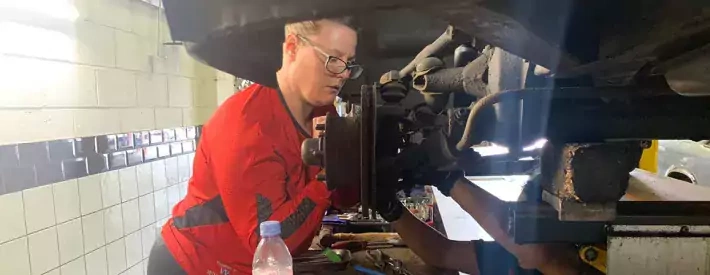
This point is often the first point of inspection if the prior steps are not normalised into the routine of a workshop. Spinning the wheels to check for noise, vibration and harshness leads swiftly to checking for play in the suspension joints, steering, and hub.
What to do if a bearing fails
If play is found at the hub and a failed wheel bearing identified, checking the disc for serviceability can be limited to a quick eyeball. If the pads look to have adequate friction material, this can often be the end of the brake inspection. A couple of quick checks can determine if the disc has suffered as a result of the failed bearing.
As the wheel wobbles on the hub, the disc can develop variances in thickness around the surface. Taking six accurate measurements at different points around the disc will determine disc thickness variation. This type of damage to braking systems can also lead to further undesirable premature wear and noise when braking.
If a significant variation is detected, the discs can contribute to the premature wear of the new bearing, so further checks for the runout of the disc and hub are essential, using a dial test indicator gauge to check the serviceability of the units. Another failed bearing on the same corner of a car can lead to a suspicious motorist who might assume that the replacement bearing was fitted incorrectly, disastrous if this motorist chooses to vent their displeasure over social media.
Preventing this repeated cycle of premature failure is therefore essential to the vehicle’s health and your workshop’s reputation (not forgetting the environmental impact – all these components require manufacturing and transportation, after all).


